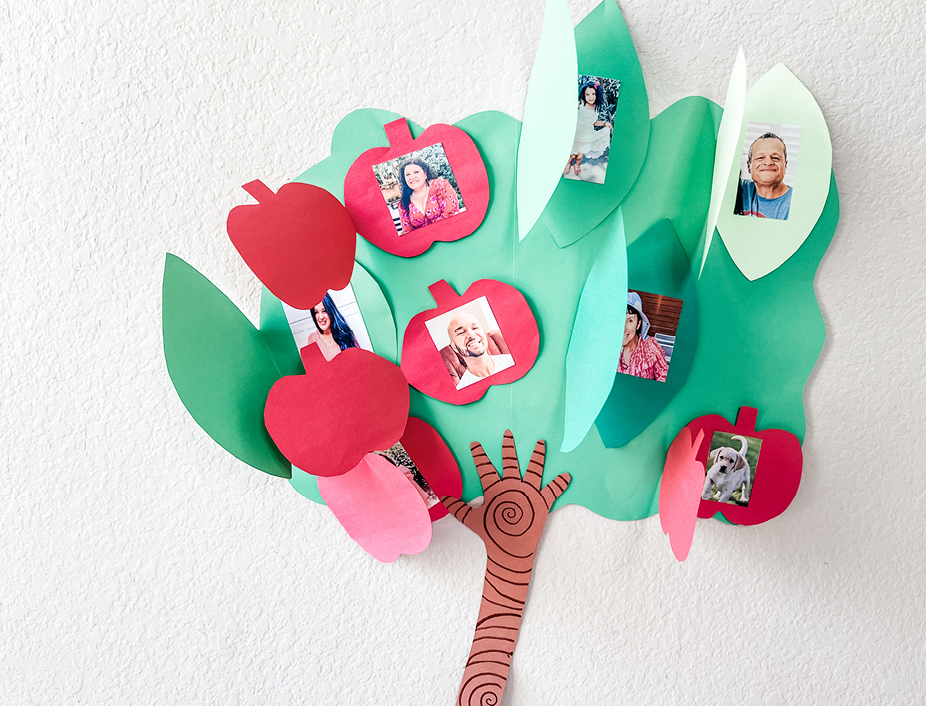
Family Apple Tree

Our Juicy Juice Family Apple Tree craft will show your little one that the apple doesn’t fall far from the tree! A fun activity to help your kids get to know all the wonderful faces of the family members who love them.
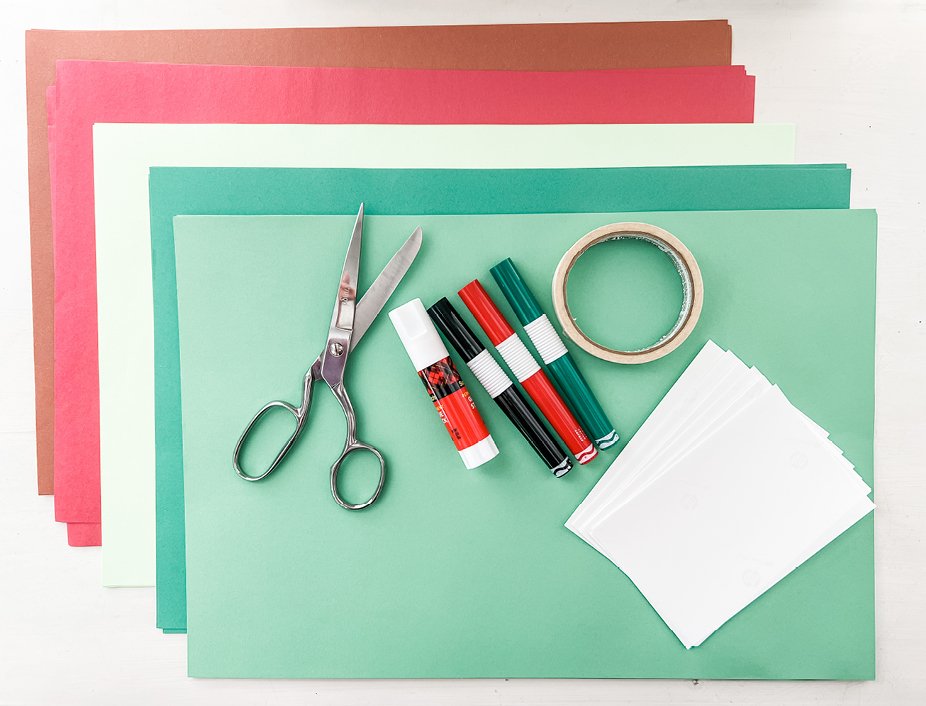
Supplies:
- Construction Paper, 12″ x 18″ (Greens, Red, Brown)
- Photo printing paper
- Scissors (Adults Assistance)
- Markers & Pencil
- Glue Stick
- Tape
STEP 1:
First things first: make sure you have all your supplies, including printed out photos of each family member you want to include on your tree!
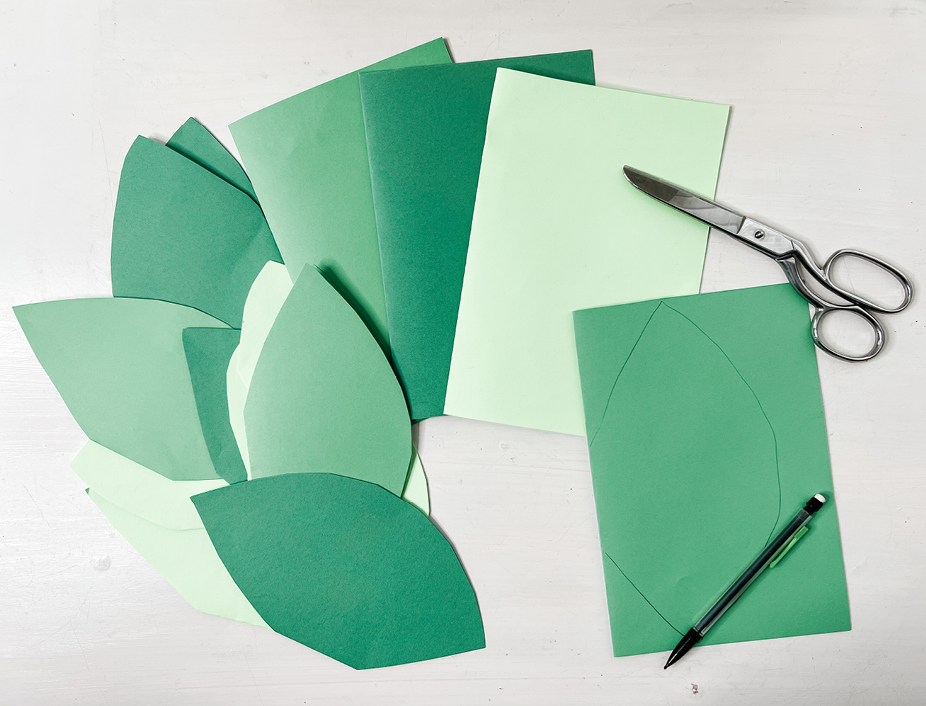
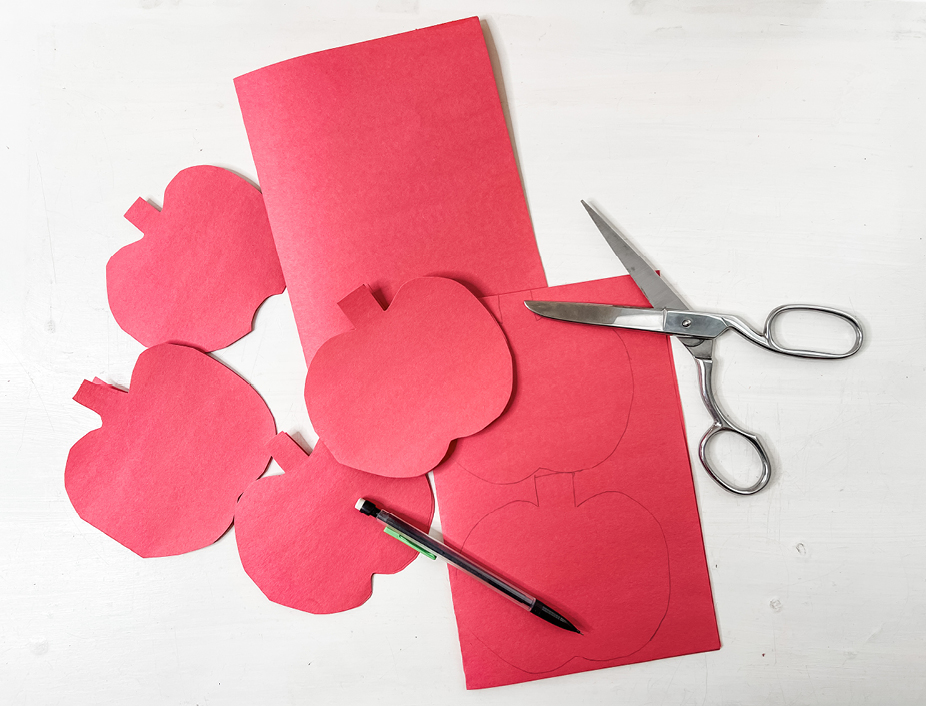
Now, let’s sketch it out! Grab a pencil and the construction paper in two colors: green and red. Feel free to use various shades of green and red. Then, fold each piece of paper in half.
Let your little one help draw outlines of oval-shaped leaves on the front of the green folded paper and circular-shaped apples on the front of the red folded paper.
As they draw, you (the adult) can begin using the scissors to cut out the shapes. We want each of your apples and leaves to open like a book when it’s done, so make sure you only cut up to the folded edge, not through it.
STEP 2:
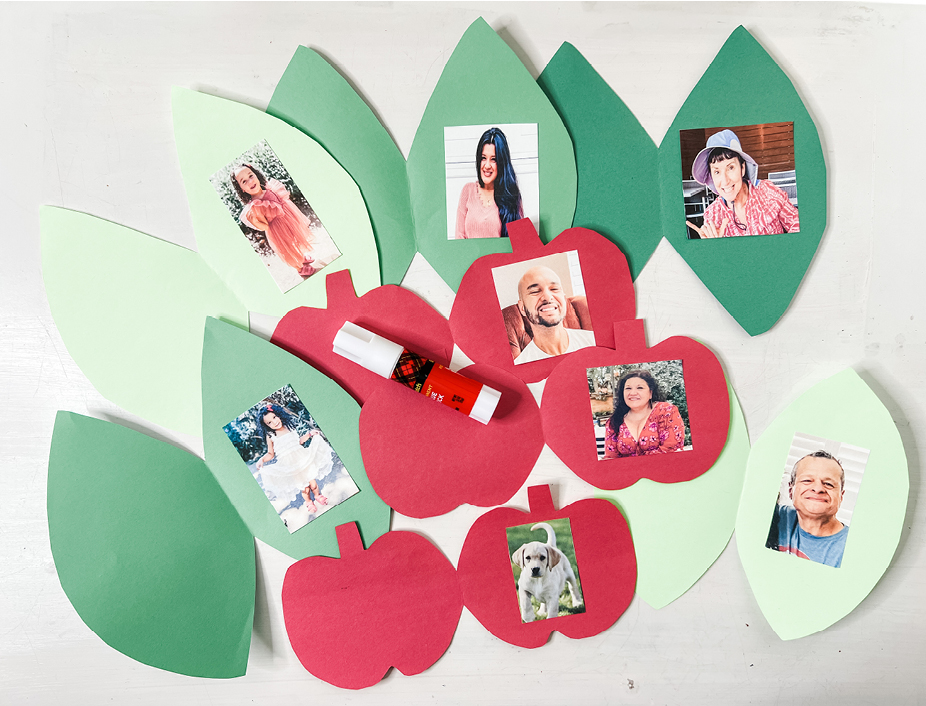
Next, let’s make sure we have enough apples and leaves for each of the family members we want to include on our tree. Wow, look at all those beautiful faces!
Let your little one decide which family member goes with which shape. Then, open to the inside page of the leaf or apple cut-out and glue the photo down. Set aside to dry.
STEP 3:
Okay, we have the leaves and apples – so what parts of the tree are still missing? That’s right! We need the trunk and the big bushy leaves of the tree!
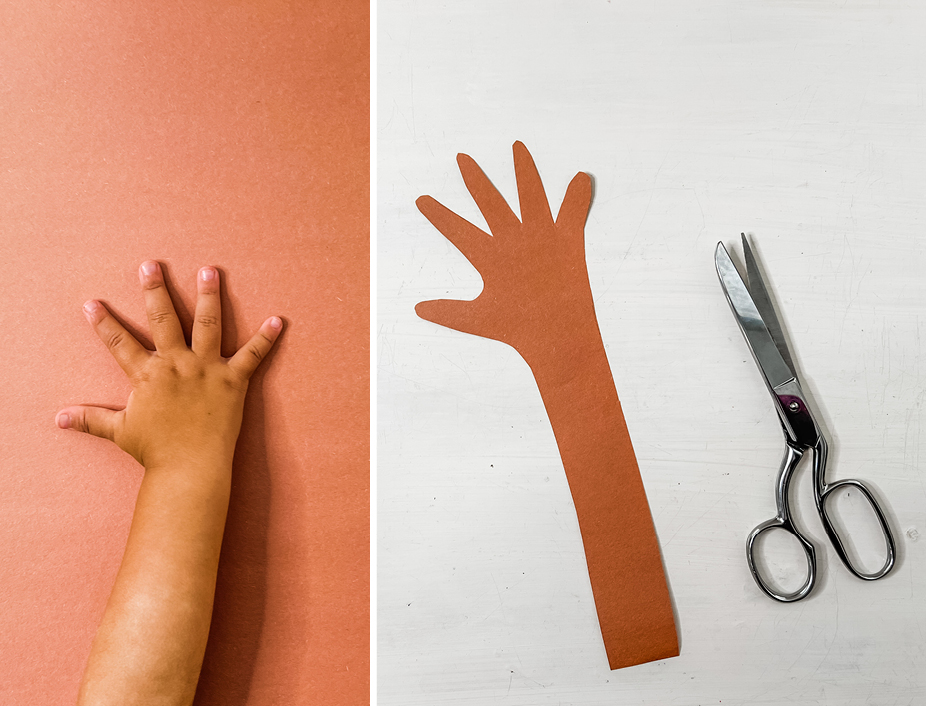
To make the trunk, have your little lay their full arm and hand with fingers spread out onto the brown construction paper. Grab the pencil and draw an outline of their forearm, hand and fingers. Then go ahead and use the scissors to cut the outline out from the paper.
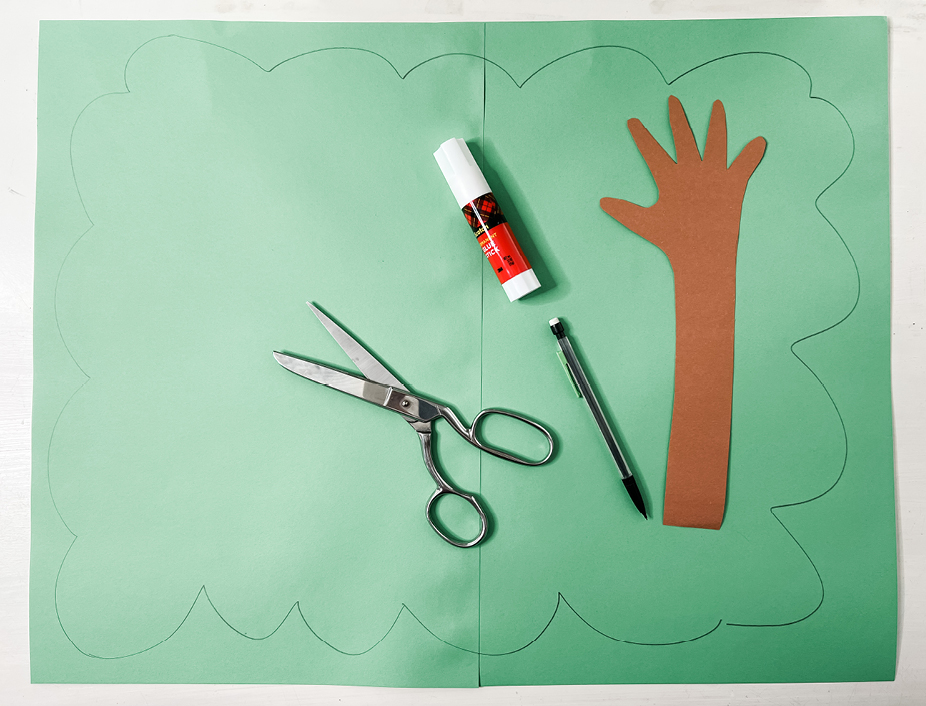
Next we’re going to tape the edges of two sheets of green construction paper together to make one big sheet. Then, use the pencil to draw big bumps (like a lowercase “m”) connecting all the way around the outer edge of the paper. Go ahead and cut that out with the scissors too. Look at that – you’ve made the big bushy leaves of your tree!
STEP 4:
With a marker, draw some beautiful swirls or designs all over your “hand-shaped tree trunk.” Now, place the hand and fingers of your “hand-shaped tree trunk” at the bottom center of the large cutout of the big, bushy leaves of the tree. When you’re happy with the placement of your tree trunk, glue it down.
If you haven’t glued the faces of your family members onto the apples and leaves already, go ahead and do that now. Then, glue the back of each of the apples and leaves all around the large cutout of the big, bushy leaves of the tree. Set aside until completely dry.

STEP 5:
The last step is the easiest one – enjoy your Family Apple Tree craft! Hang your Family Apple Tree somewhere accessible for your child and play little games by asking them questions like “Where’s Mama?” or “Do you see Grandpa?” to help them interact with it and get to know the faces of their family.