School Bus Juice Box Craft

Back to school is finally here! To get in the spirit, help your kiddo create their very own school bus! It’s an easy way for your little one to combat any nerves and instead get excited at the beginning of a new school year!
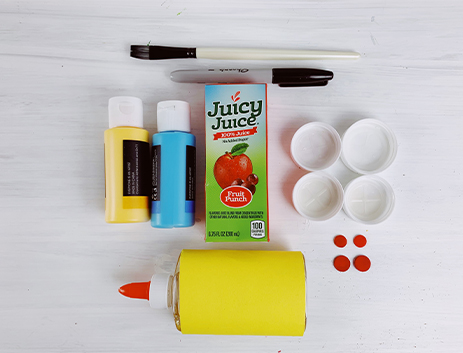
Materials:
- Empty Juicy Juice box
- Acrylic paint- yellow and blue
- Paint brush
- Red circle felt stickers
- 4 bottle caps
- Black marker
- Glue
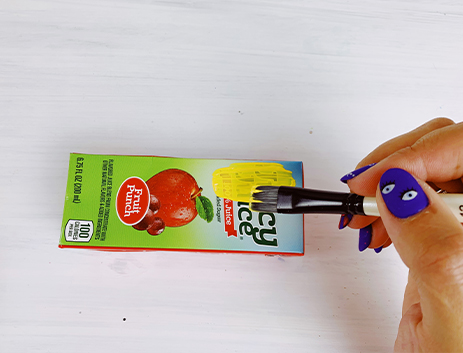
Step 1.
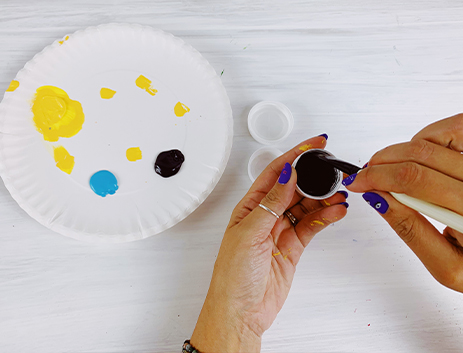
Grab the yellow paint, cover your entire juice box, and let dry. Two coats will help the color to pop more. Pro tip: Use a hair dryer to help it dry faster!
Step 2.
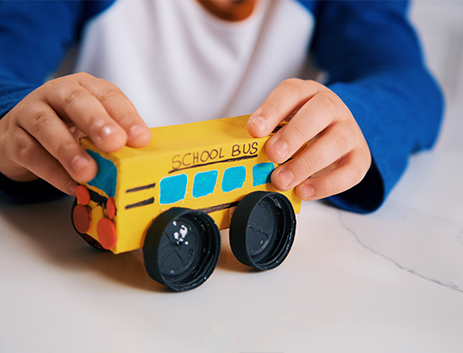
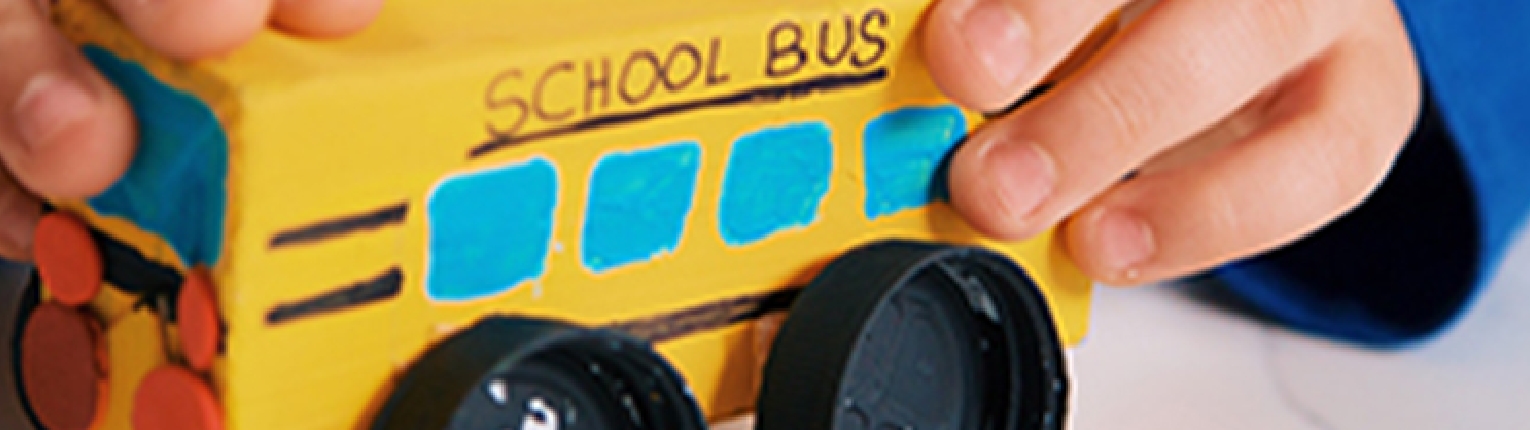
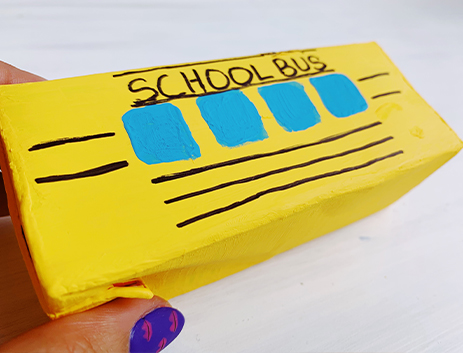
Use the blue paint to create 4 square windows on each side of your bus. Be sure to also create one larger square window on the front and back of the bus. Then, let the blue paint dry.

Step 3.
After the paint is completely dry, use the black marker to write “SCHOOL BUS” across the left and right side of your bus. Add two stripes on each end of the windows and three longer stripes below the windows. You may also add one large stripe below the window on the back of the bus.
Step 4.
Use your red felt stickers to represent the lights and place 2 smaller stickers and 2 larger stickers on the back of the bus over the stripe as shown above. You can also add 2 more larger red felt stickers on the front of the bus under the window.

Step 5.
Lastly, paint your bottle caps black to serve as wheels. After they’ve dried, glue your bottle cap wheels on the bus, 2 on each side.
Step 6.
Now that the juice box school bus is all finished, your little one can play with it anywhere! In the kitchen, in the bedroom or even on the school bus!