


DIY Wooden Photo Transfer Holiday Family Portrait
The most wonderful time of the year is finally here and that means that it’s time for the annual family photo! Getting everyone together to wear matching holiday outfits and big joyful smiles can be quite the task. But in the end, we know it will all have been worth it when you finally see how cheerful and beautiful your family looks! A great way to add a special touch to your holiday family portrait this year is to transfer it onto a piece of wood! It will bring so much more character to your walls (or tree) and it is a great alternative to the traditional holiday look. Here’s what you’ll need to make this happen:
Materials:
Laser printer
Scissors
Family photo
A piece of wood the size of your family photo (ours was 4×6)
All-in-one glue sealer and finish
Towel
Scraping tool (you can also use an old credit/store card or hard piece of plastic)
Acrylic gesso (which can be found anywhere arts and crafts are sold)
Small bowl
Sponge

Step TwoFor a more vintage look we chose a black and white photo. After printing your family photo (using a laser printer), cut it to the size of the piece of wood and spread Acrylic gesso across the entire printed side. You can use the piece of wood or a table as a surface to lean on while spreading the gesso on the photo. Then, spread Acrylic gesso on the entire surface of the wood that you would like the photo to be printed on. After this, place your family photo onto the wood. Once placed on the wood, use your scraping tool to remove any bubbles between the photo and the wood, then set aside to dry for 4-5 hours. While you wait your little one can enjoy their favorite flavor of Juicy Juice!

Step ThreeOnce dry, grab your towel and dampen it in warm water. Then lay the dampened towel over your photo for about 6 minutes.
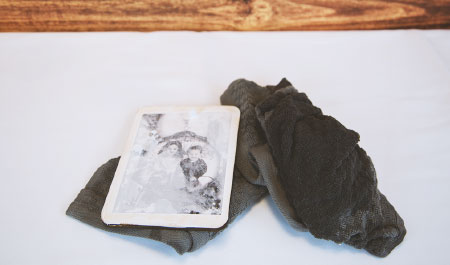
Step FourNow that your photo is slightly wet, it should be easy to peel the paper from the back of the laser printed image right off. Once you do, set it aside for an hour.
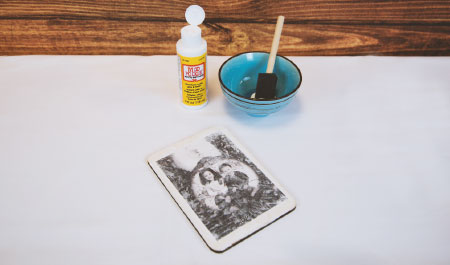
Step FiveAfter an hour, you can use your scraping tool to wipe away any excess paper from the laser printed photo. Then pour some of the all-in-one glue sealer and finish into a small bowl and use a sponge to apply it to your photo.
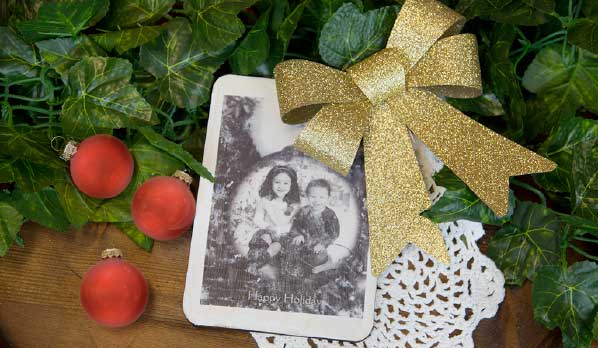
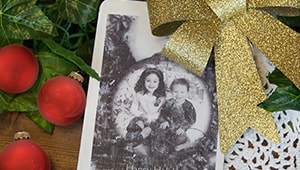
Now you’re ready to display your new look holiday family photo!