


Let it Snow: DIY Hanging Snowflakes

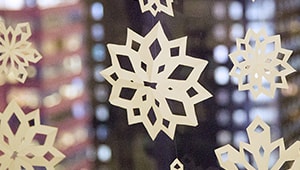
This season is all about the things that define the holidays such as hot chocolate, gingerbread cookies and snow! Yes, lots of snow! But sometimes braving the cold is not always fun. For those days when you have to stay indoors, you can still experience the joys of winter by making these simple DIY hanging snowflakes:
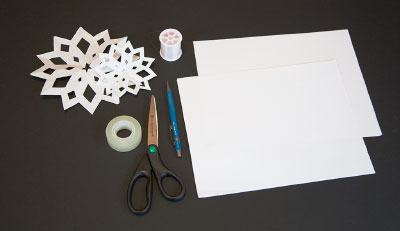
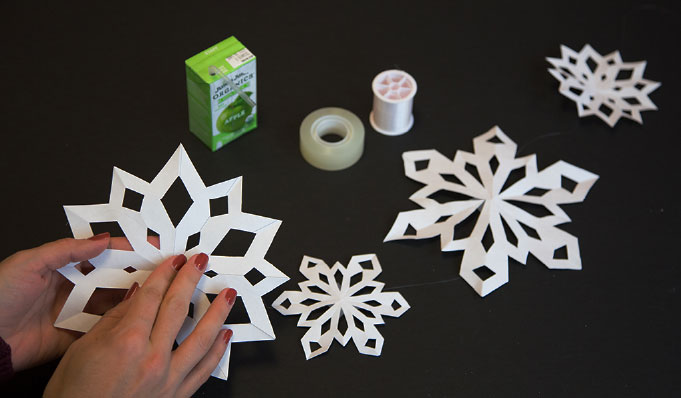
Materials:
String
Sheets of 8.5 x 11 paper
Tape
Scissors
Pen or pencil
Step One
Gather your materials.
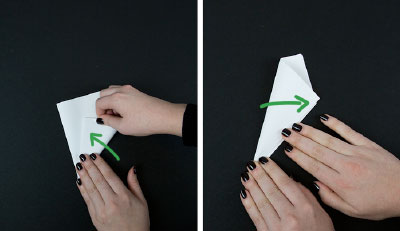
Step Two
Fold an 8.5 x 11 piece of paper in half vertically. Then fold again into a square shape as shown.

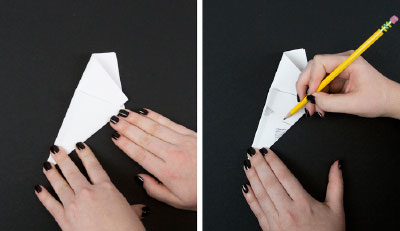
Step Three
Fold the bottom left inwards, and the rest of the top right over the bottom left as shown.
Step Four
Once folded, use a pencil to draw different geometric shapes and patterns on the smaller side of the paper to make sure that the design is on all sides of the snowflake. This is a great opportunity for your little ones to get creative with the design of their choice.
Step Five
Now help your little one cut out their design by cutting along the penciled outline.
Step Five
Unfold to reveal design and then tape a piece of string to the top of each snowflake! You can add more than one snowflake to the same piece of string.
Now that you are done, let it snow! They are ready to be hung anywhere throughout your home.